Big Red Training Guide
2023-12-12T00:27:21.782Z
What to expect
- Training is run over 2 sessions: A practical training session and an assessment conducted on a different day
- Make use of all the resources we provide you. (Checklist, operation guides etc)
Turn the machine on at the wall
Water Chiller
It’s the white box to the left of the laser cutter. You can tell that it’s on because the green light will be on. Don’t worry about the temperature just yet.
Fume Extractor
Big Red uses a large air extractor that is connected to the back of the machine. Fumes are pulled out of the machine through slots located inside the cutting bay behind the bed. Put your hand over these slots and check for slight air movement.
Place your material on the bed
Movement
- Press
escto exit the menu - Use the arrow keys to move the head around
- Press the Emergency Stop
Height check
Because Big Red’s bed can move up and down it’s possible for the bed to be raised to a point where your material will not fit. To lower the bed press the Z button to switch into vertical mode and use the down arrow. To exit vertical mode press the Z button again.
Square your material
The bed itself is free to slide around and cannot be relied upon to be square. The only horizontal squared surface is the gantry. (The bar that the laser head moves left and right on)
Engraving space
To ensure consistent engraves Big Red adds speed up/slow down buffers on each side. Unfortunately it does not take this buffer into account when determining whether your job will fit. To account for this make sure that there is at least a 5cm gap between your engrave and the edge of the bed on the horizontal axis. Don’t worry, the laser isn’t firing during the buffer space.
Check design size
The test button will use the head to trace a rectangular
bounding box. You can use this bounding box to estimate whether your
design will fit. The only consequence of your design not fitting is the
completeness of your final piece, the laser can safely be directed at
the laser bed without issue.
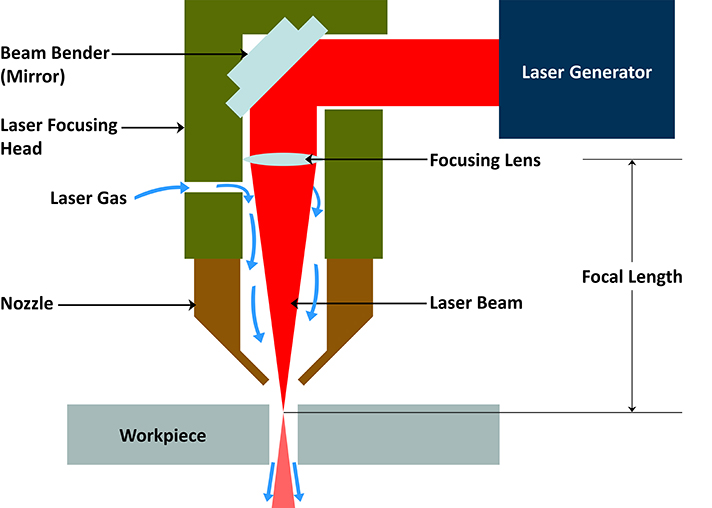
Focusing the laser
Soft material
If your material is soft (like foam, leather, fabric, toast etc) find a piece of hard material (wood/acrylic/metal) that is similar in thickness to your material and perform the following steps on the hard material instead. Once the laser is focused you can swap back to your intended material.
Probe position
Ensure that the Z probe (the stick on the left hand side of the cutting head) is over the centre of your desired cutting area. Failure to position the probe directly over your material during this step has a high likelihood of damaging the machine.
Probing
- Switch the laser into Z/vertical mode by pressing the Z button
- Place your hand over the emergency stop
- Press the
datumbutton
When things go wrong
Unlike almost every other part of laser cutting this is the one step where mistakes have a high likelihood of damaging the machine. If the probe is caught in the bed you cannot fix the problem yourself. Instead contact:
- Maintainers in the space
- #lasers on Slack
- Blake
Until you turn the machine back on it’s an easy fix for maintainers.
Fire suppression
Lasers cut by burning the material. To prevent a fire you must ensure air assist works and only cut approved materials.
- Spray bottle
- Remove the material
- Fire Blanket
- Fire Extinguisher
Prep for cutting
- Check the temperature on the chiller. It’s safe to operate when the chiller is displaying 25.5C or lower. If the temperature is above this limit wait a few minutes and check again.
- Familiarise yourself with the location of your fire suppression equipment.
- Turn on extra air assist if required
- Close the lid
Press start!
You must supervise the machine when it’s running.
There’s a few different ways to stop the machine:
- The Start/Pause button will pause your job. This is good if you need to walk away from the machine. The job can be resumed by pressing the button again.
- The Stop button will end the job and return the cutting head to the starting position.
- The emergency stop will immediately shut down the laser.
Shutdown
- Turn off the air assist. The laser cutters are situated close to the social and project areas. To prevent unnecessary noise pollution turn off the air assist before opening the lid of the machine.
- Remove your design and discard of any scraps created.
- Return the laser to the top right
- Turn off the machine at the wall